Phantasus can be installed locally, either as an R package or a Docker image.
Table of contents
Using R
Installation
Phantasus R package can be installed from Bioconductor:
if (!requireNamespace("BiocManager", quietly = TRUE))
    install.packages("BiocManager")

BiocManager::install("phantasus")
However, the current set up instruction assumes Phantasus version at least 1.23.5, which can be installed from Bioconductor-devel (requires R version 4.4). Alternatively, the latest version of Phantasus can be installed from GitHub using devtools package.
devtools::install_github("ctlab/phantasus")
Dependencies
There are several system packages that have to be installed on the system. The names of these packages will be displayed during installation. On Ubuntu one can install them beforehand and all together using command:
sudo apt-get install libapparmor-dev libfontconfig1-dev libcairo2-dev libcurl4-openssl-dev pandoc libtiff5-dev libfribidi-dev libharfbuzz-dev libssl-dev libxml2-dev libprotobuf-dev protobuf-compiler
Further, the latest version of phantasus depends on rhdf5client (>= 1.25.1) from Bioconductor 3.19, which on older systems can be more convenient to install from GitHub:
devtools::install_github("vjcitn/rhdf5client")
Configuration
Before the first run of Phantasus you need to setup it first. To perform interactive setup run:
library(phantasus)
setupPhantasus()
During this procedure Phantasus will create a default user.conf file with necessary parameters and apply them. Configuration file is stored in your R config directory (tools::R_user_dir(package = "phantasus", which = "config")). To change the default location use the R_USER_CONFIG_DIR environmental variable.
The configuration file includes the following parameters:
| Parameter | Default value | Meaning |
|---|---|---|
host | 0.0.0.0 | Address of Phantasus web application |
port | 8000 | Port |
preloaded_dir | NULL | Directory with ExpressionSet objects encoded in rda-files, that can be quickly loaded to application by name (see section Preloaded datasets) |
cache_root | value of tools::R_user_dir("phantasus", which = "cache")
| Base cache folder for Phantasus. By default contain all related files |
cache_folders
| geo_path: !expr file.path(cache_root, 'geo/') | Folder with GEO-related cache files |
annot_db: !expr file.path(cache_root, 'annotationdb/')
| Folder with gene annotation databases in sqlite format | |
fgsea_pathways:!expr file.path(cache_root, 'fgsea_pathways')
| Folder with pathways for fgsea package | |
rnaseq_counts: "https://alserglab.wustl.edu/hsds/?domain=/counts"
| Folder with RNA-seq hdf5 files in ARCHs4-like format or URL to HSDS server | |
geo_mirrors
| true_geo: "https://ftp.ncbi.nlm.nih.gov"
| GEO ftp server providing all files for related datasets |
minimal_cache: "https://alserglab.wustl.edu/files/phantasus/minimal-cache/"
| Additional ftp server with a bunch of platform annotation files in machine readable format |
The user which runs Phantasus has to have read and write permissions for all local paths mentioned in user.conf. If some folder does not exist, the setup function will create it and will prompt you to fill it using the Phantasus minimal cache mirror. Setup function is able to load automatically files for annot_db and fgsea_pathways folders. Files with RNA-seq count matrices, which are used in original Phantasus, are available at minimal cache mirror too, but should be loaded manually if desired. However, we suggest the use of HSDS server by default which is able to load count matrices for RNA-seq datasets without storing any huge files.
Running
This following R command runs the application with the default parameters, opens it in the default browser (from browser option) with address http://0.0.0.0:8000:
servePhantasus()
You can customize serving of the application by specifying following parameters:
-
hostandport(in that case Phantasus ignore these parameters inuser.conf); -
openInBrowser(by defaultTRUE).
Using Docker
To simplify deployment a phantasus docker image can be used. It is build regularly and is available at https://hub.docker.com/r/alserglab/phantasus You can load the image with the following command (assuming you have Docker installed and have permissions to use it):
docker pull alserglab/phantasus
The dockerized Phantasus automatically configures itself on the first run. It can take a while to do as it downloads some a number of resources from a remote server. Thus it is important to keep the files between the sessions, which can be achieved by using Docker volumes. These commands create a directory for phantasus files and start a phantasus container:
mkdir phantasus-cache
docker run -t -p 8000:8000 \
    --env OCPU_USER=$UID \
    --mount type=bind,source=`pwd`/phantasus-cache,target=/var/phantasus/cache \
    alserglab/phantasus
After all resources are downloaded you will get the message, that Phantasus application is up and it becomes available at http://localhost:8000. The cached resources will be stored at the phantasus-cache folder and will be owned by the current user (specified via OCPU_USER environment variable). Subsequent starts of the container will be much shorter.
For more flexibility a docker compose can be used. The corresponding compose file is available here. There are two essential notes:
- The provided docker compose script assumes that you have docker compose V2 installed. Make sure you have up-to-date version of docker (we recommend to have version >= 24.0).
- The compose script is driven by several environmental variables which should be defined in
.envfile before running the service:
| Environmental variable | Explanation |
|---|---|
OCPU_USER | Id of the user on whose behalf Phantasus application will be running. This user will own all new cache/configuration files and has to have permission to read existing ones. The default value is 33 (www-data) |
PHANTASUS_CONFIG_DIR | Path to the folder on the host machine with configuration files (user.conf and/or setup.yml). |
PHANTASUS_CACHE_DIR | Path to the folder on the host machine with Phantasus cache files. |
PHANTASUS_PRELOADED_DIR | Paths to the folder on the host machine with preloaded datasets (see section Preloaded datasets). |
Each of the above folders should exist but can be empty. If user.conf doesn’t exist, a new one with the default values will be created. We recommend not to change user.conf without a specific reason and strong understanding. The server-side of the docker image treats location of GEO-cache and preloaded directory as constants (they should always be /var/phantasus/cache/geo and /var/phantasus/cache/preloaded inside the docker respectively).
First, let’s download the compose file to the current folder:
wget https://raw.githubusercontent.com/ctlab/phantasus/master/docker-compose.yml
Next, let’s create .env file with the required variables:
echo "OCPU_USER=$(id -u)" >> .env
echo "PHANTASUS_CONFIG_DIR=./config" >> .env
echo "PHANTASUS_CACHE_DIR=./cache" >> .env
echo "PHANTASUS_PRELOADED_DIR=./preloaded" >> .env
And create the corresponding folders:
mkdir config
mkdir cache
mkdir preloaded
Finally we can run the compose script:
docker compose up
Again during the first run it will take some time to download the data. When it finishes, Phantasus will be available at http://localhost:8000.
Setting up optional features
Some of Phantasus features require additional set up.
Preloaded datasets
Preloaded datasets is a feature that allows quick access to frequently-accessed datasets or to share them inside the research group.
To store dataset on a server, one need to save list ess of ExpressionSet objects into an RData file with .rda extension into a directory as specified in servePhantasus.
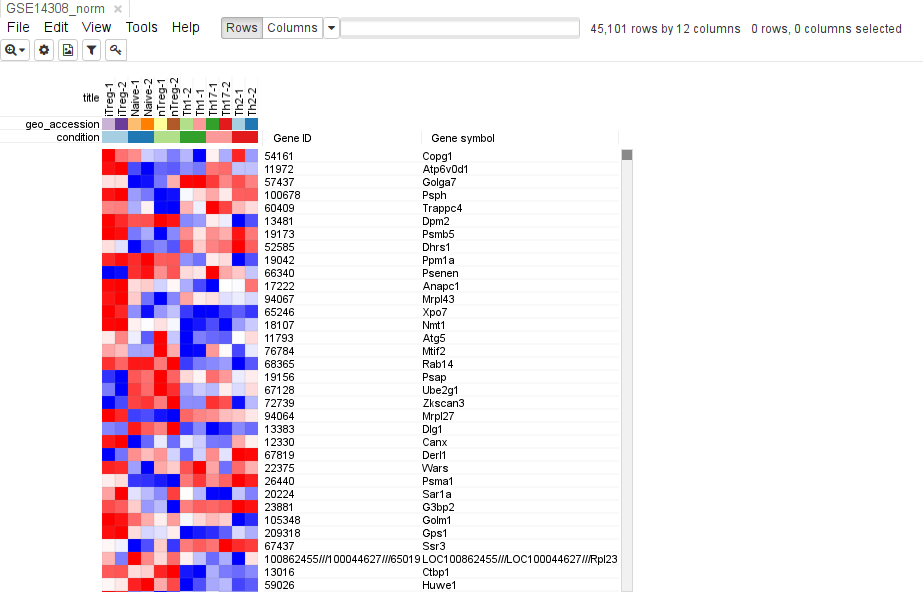
Let us preprocess and save GSE14308 dataset:
library(GEOquery)
library(limma)
gse14308 <- getGEO("GSE14308", AnnotGPL = TRUE)[[1]]
gse14308$condition <- sub("-.*$", "", gse14308$title)
pData(gse14308) <- pData(gse14308)[, c("title", "geo_accession", "condition")]
gse14308 <- gse14308[, order(gse14308$condition)]

fData(gse14308) <- fData(gse14308)[, c("Gene ID", "Gene symbol")]
exprs(gse14308) <- normalizeBetweenArrays(log2(exprs(gse14308)+1), method="quantile")

ess <- list(GSE14308_norm=gse14308)

preloadedDir <- tempdir()

save(ess, file=file.path(preloadedDir, "GSE14308_norm.rda"))
Next we can serve Phantasus with set preloadedDir option directly or change it in user.conf file:
servePhantasus(preloadedDir=preloadedDir)
There you can either put GSE14308_norm name when using open option Saved on server datasets or just open by specifying the name in the URL: http://localhost:8000/?preloaded=GSE14308_norm
Support for RNA-seq datasets
Phantasus supports loading RNA-seq datasets from GEO using precomputed gene expression counts. There are two ways to enable this feature. The simplest way is to use count matrices from the official Phantasus web-server. In order to do that you need the rnaseq_counts setting in the user.conf file equal to "https://alserglab.wustl.edu/hsds/?domain=/counts". Another way is to download gene level expression files from Phantasus minimal cache mirror and set containing folder as a value of rnaseq_counts setting in user.conf. In both ways count values will be available as computed by ARCHS4 and DEE2 projects.
Pathway database for FGSEA
FGSEA tool requires a pathway databases in .rds files under the fgsea_pathways folder from user.conf. Pathway database is an .rds file containing dataframe with columns: geneID, pathName, geneSymbol. You can see an example dataframe by entering:
data("fgseaExample", package="phantasus")
head(fgseaExample)
##   geneID                                pathName geneSymbol
## 1  11461 5991955_Cell-cell_junction_organization       Actb
## 2  11465 5991955_Cell-cell_junction_organization      Actg1
## 3  12385 5991955_Cell-cell_junction_organization     Ctnna1
## 4  12388 5991955_Cell-cell_junction_organization     Ctnnd1
## 5  12550 5991955_Cell-cell_junction_organization       Cdh1
## 6  12552 5991955_Cell-cell_junction_organization      Cdh11
Annotation database for AnnotationDB tool
AnnotationDB tool requires annotation databases under the annot_db folder from user.conf. For example you can get Mus Musculus database package from Bioconductor, extract org.Mm.eg.sqlite, and put it to <cacheDir>/annotationdb folder.